Oh To Be Sewing Again!

Hello!


It’s been quite some time, hasn’t it? Well I’m back! I’m sewing again, with lots of projects coming up.

Today I’ll go over my Deer and Doe skirt, as well as a simple petticoat. I didn’t make them to go together, especially considering the skirt doesn’t actually need a petticoat. Made out of denim, and an a line shape, I don’t think you could even stick one under there except for decoration.

To start: The Skirt

I already have plans for multiples of this skirt. I love the shape, the fit, and the fact that it’s a high waisted skirt. High waisted fashions seem to be loved or hated with me falling into the former category. Shorts, pants, skirts, high waisted pieces are just supremely flattering in my opinion. Thankfully my boyfriend agrees. Again, sorry for the somewhat crummy pictures, lighting in Portland is not easy to work with. The ‘halo’ around my head is actually the lamp! I thought it was funny. You’ll also notice my work area is a mess. I left it like that because I feel most people don’t have a picture perfect setup or that it is indeed constantly clean and tidy. This is my true workspace and I’m not ashamed to show it off!

DSCF3244

This pattern was very simple as well in my experience. It says for intermediate sewers on the envelope but I think a beginner would have no trouble with it. It is lined, and needs an invisible zipper, with the instructions easily explaining those steps.

DSCF3242

What I found to be most frustrating was how to style it! The website shows the model wearing a longer, tight fitting shirt but for a more summery or casual look I experimented. I do like it with a tank top and was also happy to show my nerdy side. The shirt says Hogwarts Alumni with the crest in the middle of the shirt, something the skirt covers up.

DSCF3260


To Finish: The Petticoat

My favorite part of this project is the confidence it gave me to make more petticoats of different styles, shapes, and materials.

The yoke is just basic lining fabric and the tulle isn’t anything special either. The elastic for the waist is 1.5″ I believe and when put together it makes for a cheap yet effective petticoat! This is also one of the cheaper projects. I used about 6 yards of tulle, and when it’s on sale it can be as cheap as a dollar a yard, with elastic being a couple bucks for a few yards, and lining (of which I needed a yard) can be 5 dollars or less depending on the brand and sale. So this petticoat was about 8 dollars because I only needed to buy the tulle, everything else was already in my stash. Not bad!

The shape was a little flat, so I went ahead and added more near the top.Now it has a sort of bell shape, with more volume up top and leveling out toward the bottom. I have barely enough tulle left to make a second tier but I think I will, just to get more near the bottom. Or I might take the top tier and move it down. That’s something for later though, as I’ve gotten tired of the tulle and want to work on some personal projects while I can.

DSCF3277

Simple elastic casing, french seams where possible.

DSCF3275.JPG

Wayward thread! But check out that french seam!

DSCF3273

Upside down but easy enough to see how simple it is.

It’s actually a nice shape but not as common I think, so I’d like to get that lower tier to make the bottom come out a bit farther.

Like I said though, I have some fun projects coming up! I’ll be making a dress for my boyfriend’s mother for a wedding she’s going to (that I wish I could go to as well), as well as the bridesmaid dresses for the wedding I am in as maid of honor.

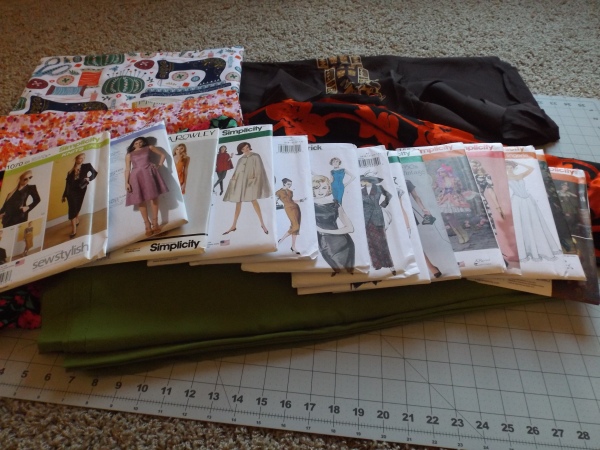
Aside from that, I’m working on Simplicity S0210, a 70’s dress, and I just finished up Simplicity S1460, a 50’s shirt with peplum.  I’ll blog about that later, for now I’m going to finish cutting out S0210!

I’m glad to be back to blogging, it’ll be nice to be cataloging my progress again.


Until next time!

—Bethany Out

Taking A Hiatus

As the title says, I’m taking a short hiatus. I’ve got a few projects going on but as of now I’ve got just a bit t00 much going on to blog about them! This is no where near a  long or permanent break, as I do enjoy blogging about my projects and I am still sewing up new things.


Some upcoming posts:

The Anemone Skirt from Deer&Doe patterns

Interfacing: It’s the Pits

Sewing with Denim

Fabric Haul from Hawthorne Threads


and more!


So if you do  like to stop by and say hi, thank you, and I’ll be back to chat sewing soon!


—Bethany Out

Simplicity 2154 Take 1

This shirt is astounding. I am head over heels with this pattern! It fits well straight from the pattern (although I did do the petite alteration, easy peasy), is quite customizable, and a pretty quick sew compared to some shirt patterns I’ve tried. In fact, I think of the last 2 or 3 shirts I’ve tried making this is the only one I’ve finished!


Simplicity 2154 is a semi-fitted shirt with a side zipper, collar, button and loop at the back of the neck, and a huge bow at the front of the collar. I’ve seen versions of this shirt without the bow and it really gives it a more modern feel, so I’m thinking of making future versions with detachable bows so I can just decide what look I want for the day.

DSCF3200.JPG

The zipper was a bit odd and I’m considering either making a change to an invisible zipper, or seeing if I can find a different zipper with a smaller pull. It just makes it a little bulky at the top and sure it’s on the side but still it’s more awkward than I like. The pattern tells you do sew the zipper with the fabric covering just one side and that is a good technique. You just press in part of the seam allowance on one side and compensate with more on the other side. It means a covered zipper in the end and the instructions were easy to follow. I also used a separating zipper for mine though the pattern calls for a regular one.

DSCF3186.JPG

I also noticed only after taking these pictures just how bad the back is…so it looks like the next one will needs the back shortened for sure. Oh the joys of being petite! I’ll stick in this picture that shows how bad it is, and this way the next time I adjust it I’ll have a good before and after set for fixing fitting issues!

DSCF3206.JPG

As for the fabric, it’s a chambray from Fabric Depot. It was my first time working with chambray and I’m addicted. I just bought 4 other chambray colors from Hawthorne Threads to use as separates, a purple, white, off white, and a brown. I plan on using them with patterns I just got from Deer&Doe, the Anemone skirt, Datura Blouse, and their new Melilot shirt. These are great staples that can be made in lots of colors and therefore create a great wardrobe!

Back to this shirt though, I do really love it. I want to make a few others in a print or two because this shirt is not only casual enough for jeans, it’s pretty enough for work with a cardigan. Made without the bow and it’s even more flexible! I’d highly recommend this pattern and I’m excited to try the skirt and cardigan as well.

That’s all for now, I do have a lot I’m planning and I just got Gertie’s new Ultimate Dress Book! I am already in love with some of the patterns and I’ll give a proper review soon for those that may have been on the fence like me. I can say though I am VERY happy I picked it up.

Gertie's Book.jpg

I’ll do that review soon, as well as another post with another shirt I hope!

Until next time,

—Bethany Out


The Fable Dress Version Two: Pretty in Purple

I told you all I had another Fable dress in the works and here it is!

This purple floral fabric has been in my stash for a while now because while I adore the fabric I had never known what to do with it. This pattern happened to be perfect for it, or the fabric was perfect for the fabric, whichever! It was a gift from a friend in Brazil who happens to own a fabric/craft shop. I had already made a dress previously with the red floral fabric he sent me and this floral was just begging to be made.


I’m putting it out there now, these pictures are not as good as usual. I don’t kn ow what is with my camera but something is off and the pictures have almost a fuzzy quality. An issue with zoom is probably the best bet but that’s not something I know how to fix! I tried it on several different settings, to no avail. Still, I hope you get the idea at least and maybe I’ll get some phone pictures up later.

DSCF3098

Since this is my second one I decided to change things up a little bit. I made separates! I was going to make the full dress but after seeing the skirt and how perfectly it gathered I just couldn’t resist making it a separate to wear around more often. I’ll also admit that there was some pulling on the waistband in the back that just would not go away, and since I’m out of the fabric for it I just made separates to hide the issue. I’m guessing the waistband wasn’t cut on the grain correctly enough and so sewing it up pulled things funny and created the drag lines. That’s my most likely conclusion because the other dress didn’t have that issue. It could also be an interfacing issue. There’s still a hint of drag but it is considerably less without the skirt pulling at the bodice.

DSCF3038


This skirt will be perfect for sunny days out and even to feel cute at home. The top is a crop top, though I could probably extend the bodice to cover more if I’d like in any future version. I really just cannot get enough of these gathers! The skirt is just so dreamy and gathered so nicely. I think part of it is because this time I lined the skirt. I had to get creative though because I’m not sure what I did but something happened and the back skirt piece just did not fit. At all. So instead of lining it as I usually would have, I had the back piece gathered at the top but the sides are not sewn down and the bottom is hemmed separately. The front is all one piece essentially which was quite fun to work with. It gave the fabric a certain weight and stiffness that I don’t usually see and I enjoyed it!

DSCF3049

Another change I made was using a button at the waistband of the skirt. I still used a hook and eye at the center front for the other side of the pocket. Having the skirt still wrap around is quite nice. I think I prefer it this way and see myself using this pattern for the skirt alone to get some cute pieces made. Changing the skirt length for different fabrics can give dramatically different looks so I’m thinking that I’ll make longer skirts in nicer fabric for office looks and shorter fun prints for everyday wear.

DSCF3001

DSCF2788

DSCF2813

DSCF2824

Stay tuned for more/better pictures! I hope my camera acts better soon, the last dress was shot under similar conditions so the dimness shouldn’t be an issue. Any suggestions would be nice as well!

Has anyone else made this up yet? I’d love to see what you’ve done. Email me, message me on Instagram, or just comment here! Have a great week everyone.


Until Next Time,

—Bethany Out

Operation Beautify: Making Progress!

This is going to take forever! I have made quite good progress already but this is pretty intensive. It has already taken me several hours and I’m not even halfway through this flower, the smaller flower of the two in the piece.

For the purple flower, I’m using the long and short stitch. You can see where I start to get more comfortable with it as it blends together more and creates a smoother transition between colors. I used all 6 strands for this and have noticed that using more strands is really the only way to go for anything other than backstitch. It just makes everything fuller, neater, and easier to manage.

DSCF2721.JPG

DSCF2723.JPG

You can see towards the top where I started and how it looks less blended than towards the bottom. 

I also finally put some beads on one stem and one line of the large flower. They are put on very differently. The yellow beads are smaller so they are just all on one strand. The lines are also smaller and so are easier to manage. The green beads are larger and over longer lines so I used a stitch I found in my new book! It is called the Coral Stitch and it is a knot stitch. I really like that the knots make it easier to put one bead on at a time without doing anything odd like backtracking. It also looks like it’ll be a great stitch for filling or outlines. Something to add a bit of texture. Either way, I like it!

DSCF2722.JPG

I really like this Coral Stitch! You can somewhat see the knots, and how the lengths between the beads aren’t so even. That’s ok, they’ll get more even as I practice.

DSCF2724.JPG

I’ve only got the one line of yellow beads so far. I like them, I wonder if doing the beads before stitching will be harder, or if it’s easier. I’ll find out!

I also got these really great mini hoops! They will be a gift, I think, I just have to figure out which way to go with it. I got them from Dandelyne on Etsy. She’s in Australia so it took them a while to get to me but man it is worth it! She’s not only such a great shop owner who communicates and provides a high quality product, she’s incredibly inspirational. I follower her on Instagram as well, where she is always posting about other people’s work for inspiration. She is such a positive person. Check her out if you are looking into some mini hoops, she has several options and you can make necklaces or brooches with them. Really, the possibilities are endless!

Mini Hoop.jpg

I can’t wait to get more and make such cute gifts!

That’s all I’ve got this week! I’m still finishing up my Fable Dress version 2 and aside from work, have just been trying to get enough sleep.

What are your favorite embroidery stitches?


Oh! And one last thing – my posts don’t contain affiliate links. If you notice me linking to other people’s sites and products, it is just me sharing what I personally love. I don’t make money if you click the link and buy anything, I don’t even really know how that works. I just wanted to make that clear, everything I share is shared only to show my appreciation of a product/shop/person/whatever. Thanks!


Until next time,

—Bethany Out


The Fable Dress: Part 2: The Skirt

Alright!

So last we left off, you attached the waistband to the bodice after sewing the interfacing to the lining pieces, sewing the lining and bodice shell pieces together, and lining the bodice. A little lost? Read about sizing, fabric, and sewing the bodice here.  Still need to buy the pattern? Go to Vesta Patterns to pick up The Fable in your shape right now!

Now we get to sew the skirt up and this is where things get interesting. It starts off easily enough. Attach the pocket pieces to the skirt pieces. Make sure you have the right pocket pieces to the right sides of the skirt (I labeled my skirt to make sure I knew which side was which) and stitch up the side, around the pocket, and to the top as you would a regular skirt pocket. The left pocket takes a little bit more thinking!

DSCF2687.JPG

Sewn up like a regular pocket, you’ll see that this pocket ‘starts’ farther down than the left pocket. Ignore my lining being non-attached on one side, it was fussy.

Attach the left pocket pieces to the skirt, making sure to take care of which side you’re attaching to the skirt. The long part of the pocket is what gets attached to the skirt. The shorter ends are what faces out from the skirt. You will also not sew up the pocket completely. Attach the long parts of the pocket to the sides of the skirt, sew up the side seam and around the pocket only until the short sides of the pocket. The short sides will actually get a rolled hem and will be attached to the waistband. First, some pictures:

Untitled design (2).png

So the red line shows the longer side and the blue is the shorter side. The long side gets sewn to the skirt, while the short side gets a rolled hem.

DSCF2689.JPG

So you can see the long side (on the right) sewn to the skirt piece, and the short side (on the left) is free.

Hopefully this is pretty easy to follow. But to recap: The right pocket is sewn as normal pockets, the left pocket is sewn differently. Instead of sewing all the way up the pocket with the ‘short’ sides, you only sew to the bottom of the short side and finish the pocket edges with a rolled hem. Or you can do what I did and just sew them back. I was slightly lazy.

Untitled design (2).png

So just to give you that visual again, the red sides are sewn to the skirt pieces, and the blue sides are given a hem. You will sew the pocket together around the bottom until the bottom of the short side.

DSCF2691.JPG

The blue line shows the stitching line, ending at the red line, where the side will be given a rolled hem.

DSCF2696.JPG

With everything sewn together, you’ll see the pocket is far more open becuase it is lined up at the top of the skirt pieces. This lets it open up more so that you can get in and out of the dress.

DSCF2698.JPG

So this is my rolled hem on the pocket…wanna know how I got it so neat?!?!?! Well, I used the overlock stitch on the edges and then used that as a guide to roll it under. It was absolutely perfect! You’re welcome. 😉

Now we attach the skirt to the waistband. I do like that this dress pattern doesn’t directly attach the skirt and the bodice. That’s why it is so important to have the waistband be sufficiently interfaced, it does have a lot to do and isn’t merely decorative. I’ll be honest here, I did have some trouble with this next part. Mostly because it is important to have everything labeled properly. I mentioned before labeling the waistband but I’ll be honest and say I didn’t do it enough. I also tried doing this at midnight after a long shift at work and was not sufficiently rested. The important spots to know are the side seams, center back, and the bodice front. Those will help you line everything up so that the pockets don’t get wonky. Stitch gathering lines in the top of the skirt as the instructions say. Personally, I didn’t gather the skirt until lining up the important spots with the pockets to help me keep track of everything.

DSCF2704.JPG

Extra tip alert! If you want to be able to find any notches in the skirt pieces, use brightly colored pencil instead of the usual notches or triangles. Gathering really hides things like that so the bright colors make things a lot easier. This is something I figured out after many frustrating gathered skirt issues.

When you go to attach the skirt to the inside waistband piece, the wrong side of the skirt fabric should be facing the inside of the inside waistband piece. Ha! That’s a picture that’s difficult to wrap your head around. Thankfully I have a picture to help:

DSCF2705.JPG

So my skirt has the right side of the fabric facing me, and is going to be sewn to the inside waistband, on the inner most side. You can see the inside of the bodice here to help you visualize it more.

Some important things to note: The left pocket gets folded back on the skirt on the side with the wrap around strap (the right side). That’s why the short sides of the pocket are left unfinished, this side of the pocket proves to be the opening that lets you get into the skirt and becomes the opening of the pocket. I know I’ve said that before but it took me reading/hearing/doing it about 5 times before I +totally+ understood the concept. So I’m sorry but I’m just trying to help!

When you attach the skirt to the waistband, the right pocket seam should line up with the bodice right side seam. The center back of the skirt back and center back of the waistband should line up The left side of the left pocket/skirt seam should line up with the bodice left side seam. The left side of the left pocket does not get folded back, it extends to the bodice front. Here’s a picture to show what I mean:

DSCF2719.JPG

You can see the left edge of the bodice on the left side of the picture, and the pocket is actually straight on the waistband, and then the skirt starts at the bodice left side seam. It gets covered by the waistband from the right side when it wraps around.


DSCF2711.JPG

This shows the pocket being folded over on the right hand side, you can see the rolled edge of the ‘short’ side of the pocket in the middle of the picture. The white on the waistband is my interfacing. I put that on the outside waistband, honestly couldn’t tell you  why, hehe!

DSCF2712.JPG

You can see the gathered part of the skirt on the bottom left, and the pocket folded over to essentially cover the gathering. That all gets sewn to the waistband, so you sew through 3 layers. The waistband itself, the gathered skirt, and the pocket folded back on the skirt. Again, this is the pocket portion on the wrap around part of the waistband, the part that extends past the bodice.

The left pocket on the long part of the waistband gets folded back. I folded it back AFTER gathering the skirt to make sure the skirt fit to the waistband, because remember, the pocket does NOT get gathered. So I first lined everything up: The left pocket seam on the right side of the waistband, the right pocket with the bodice right seam, center backs, the left pocket seam (so the back skirt piece with the left pocket attached) and then the rolled hem of the left pocket. Gather the skirt, fold the left pocket on the right side back, and sew it up!

DSCF2720.JPG

Here is the front of the dress! You can see the gathered skirt on the left of the picture, the pocket is folded behind it. On the right side of the picture is the left pocket that does not get folded back but is sewn to the waistband by itself.

After that, you sew down the top waistband, squaring the ends, finish the bodice with bias tape if you haven’t already, give it a hem, and sew on the buttons/hook and eyes. That’s your dress! The buttons could be done earlier in the game as well as the bias tape. The hemming I would leave until the end, as well as the hook and eye closures.

If you still have questions, let me know! I’d be happy to answer them and depending on the questions, maybe make a new tutorial or special extended steps later. I hope you love your new dress, I love all of mine. I have 3 now, two purple and floral versions, and a woodsy version. They all fit fantastically and once you get the hang of it, are very easy to sew up.

Enjoy!

The Fable Dress: Part One: The Bodice

Hello everyone! Today I am very happy to share the first part of my walkthrough for the Fable Dress Pattern by Vesta Patterns! It’s a dirndl inspired dress, with POCKETS, for the modern and whimsical woman. I happen to love this pattern so much, I already have THREE versions. Two still need the very finishing touches but the dress I have dubbed the ‘woodsy dress’ has pictures and everything. Shall we take a look at how amazingly cute this dress is when finished?

DSCF2646.JPG

I am about to jump, hence the odd pose. 😀

DSCF2664.JPG

Fun fact, not once did I adjust my dress during these shenanigans, it stayed put and was very comfortable.


DSCF2510.JPG

Enter a caption

DSCF2513.JPG

I needed to shorten the bodice a hair for this dress, which I did in the next version I made, but it still came out beautifully! And still a million times better than RTW, in my opinion.


This is meant as a more intermediate pattern so this walkthrough doesn’t have extreme detail but it will hopefully help illuminate some of the trickier aspects of the pattern,  which for most people (and myself) that would be in part two with the skirt and pockets.

One of the interesting aspects of this dress is that the shapes are different. This is to focus more on getting better fitting patterns for real people rather than trying to fit the person to the pattern. This part can be a little tricky since it’s a different concept but don’t worry, we’ll get you through. First make sure you have your measurements. We’re going to focus on cup size and waist size. According to my straight measurements I should be an S shape size 2. However, after sewing up an S the cup is just all off. The A shape size 2 however is a perfect fit! If you’re not sure about cup size don’t fret it’s incredibly easy to figure out. Just measure your bust and underbust, subtract the difference, and you’re done! Here’s the basics of that:

1″ difference: A cup

2″: B

3″: C

4″: D

And so on. According to my measurements (34″ bust, 30″ underbust ish) I am definitely more of an A than S shape, with the S shape size 2 being a 6 inch difference rather than the 4ish of the A shape. From there I went more with my waist size than bust measurements which put me at a size 2 with a 25″ waist. Take a close look at each shape’s approximate cup size and waist size to help you best determine your shape and size!

DSCF2320.JPG

This was the test of the S shape. As you can see, the bust is HUGE even though the measurements seem right.

DSCF2321.JPG

The rest of it fit decently considering, but look at how much better the A shape fits below.

DSCF2586.JPG

I’ve put together this printed PDF several times now and I haven’t had any major issues. Whitney has also made it so that you shouldn’t have to cut anything to get it to line up correctly and I certainly didn’t cut the paper before putting it together. Apparently that is a common step in printed patterns? I’ve never come across that before and it sounds like such a headache. Whitney has you covered though and has made this pattern as condensed (to save paper) as possible. I used swedish tracing paper to trace the pattern and was set to go from there!

Let’s talk really quick about fabric choices. This pattern is made for simple cotton, which is such a dream because you can really have fun with printed quilting cotton! My three dresses are made of totally different fabrics which is a whole other kind of wow. This implies a lack of restriction if you ask me. Go crazy! For one purple and floral dress, the purple fabric is this bottomweight poly blend I found on clearance at Hancock Fabrics, a good medium weight fabric. The floral fabric is a satin like poly blend, definitely a lighter weight. For the woodsy dress the green is a denim like bottomweight with a touch of spandex and the tree fabric is straight rayon. The brown is actually just a plain cotton. For the other purple and floral dress, I used all regular cotton. Really, the possibilities are endless!

The purple and floral bodice is self lined while the woodsy dress is lined with cotton. The interfacing is all cotton believe it or not! There are so many layers, especially with the front bodice, that special interfacing is not required. If I were you though I would definitely be wary of how well your waistband is interfaced. It will have a lot to support between the skirt, the large left pocket, and having hooks and eyes sewn onto it so it needs to be well interfaced. I noticed that my waistband on my woodsy dress needs to be better interfaced especially because the fabric is heavier, gathered rayon is quite weighty, and the waistband itself is thinner fabric. So please be conscious of that when choosing your fabrics and interfacing. With straight cotton I didn’t have any interfacing issues I noticed, the skirt doesn’t pull anything down and with essentially 3 waistband layers everything stays put.

Once you’ve washed and cut your fabric, you’ll be set to start. The bodice is actually quite simple to sew: attach interfacing pieces to the lining pieces, sew up the outer bodice pieces together, sew the lining pieces together, sew the lining to the bodice. That’s the super simplified version at least. How you want to line the upper half and sides of the bodice is up to you. You can sew them right sides together and understitch the neckline or just lay one on top of the other, sew together, and finish with bias tape. I happened to use bias tape for both versions of my dress because I happen to hate understitching with a passion! I will however be happy to make a complimentary walkthrough showing the former method with understitching if enough people would like. If your bodice fabric is stiff enough, you could just use the interfacing as regular facing and forgo the lining. That is a choice you’ll have to make yourself and of course you can always ask me if you’d like!

Let’s go into more detail on getting all of that accomplished though, starting with attaching the interfacing. The pattern instructions show you how everything lines up. I didn’t notice any issues with how things lined up and so it should fit perfectly. Here are my pictures of this step:

DSCF2347.JPG

This is the lining and interfacing of my woodsy dress, which is just plain blue quilting cotton.

DSCF2350.JPG

The pieces all attached! Ignore my sewed shoulders, I unstitched those after this picture. You can see the interfacing on the lining. My seams don’t look pressed because they aren’t…make sure you do that!

One thing that will depend on how you line the bodice is when and how you’ll turn in the front sections. If you are using bias tape to finish your seams, then sew your lining to your outer shell and then turn in the 1.5″ on the front panel. You can sew the lining to the outer shell up to the 1.5″ mark then turn them in separately as well if you’d like. I chose to do mine together! You can now do the buttonholes, or you can do those towards the end. Depending on how you’ve lined the bodice, you could also do the bias tape finishing on the neckline and armholes now instead of later. Sometimes it’s nice to not have so much ‘finishing’ work to do at the end of a project. Get that out of the way now to enjoy ‘faster’ results later!

DSCF2362.JPG

This picture shows the lining and bodice shell attached to each other, the front section turned in, and the waistband attached. The top of the bodice (the left side of the picture) hasn’t been finished yet, I did overlock everything to keep things neat and strong.

Extra tip alert! Use topstitching to your advantage on this pattern. If you happen to have somewhat bulky fabric, like on my purple dress, you may want to topstitch the outer shell and lining together at the shoulder and front seams to help keep things where they should be. I did this on both of my dresses though really the woodsy one didn’t need it as much as the other one did.

DSCF2380.JPG

This picture is more about turning the waistband under to sew it to the skirt, but you can see how I stitched the back seams to keep the lining and outer shell together. You could also stitch in the ditch with matching thread so you can’t see it, but that is a design choice you can make yourself! I like the pop of color (or white) though, that’s something you’ll see me do often.

Once you’ve got your bodice done, it is time for the waistband! Do some prep now by pressing up the bottom edge of the waistband pieces. This will make the later steps easier I promise! Also double check that your marks are all there and if you’re having a hard time keeping track (like I was) just make notes on the waistband. I wrote S.S. for side seams, B.F. for bodice front, and so on for the corresponding notches. Do whatever works for you to help you remember what goes where! Remember though that the longer end that wraps around will wrap around from the right to the left. I may or may not have accidentally sewed the waistband on backwards a time or two. I plead the fifth.

DSCF2360.JPG

The waistband will extend out on the right side and just a tad bit on the left side for turning it in on itself to ‘finish’ the edges at the end off. That’s what she means by boxing the ends by the way, it means to fold the waistband in at the end to finish off that edge. The left side is on the top, the right side on the bottom.

Stitch the waistband to the bodice, like a sandwich as it says in the instructions. Just make sure the long side goes to the right and extends past the bodice. Press everything nice and neat If you’d like to topstitch the waistband go ahead and do so!

That’s it for the first section of this so called sew-along, read here for the skirt and attaching the waistband to the skirt!


Operation Beautify: The Saga Begins

Hello!

So I’ve already mentioned this on my Instagram but I have started on Operation Beautify in an attempt to make my house prettier and nicer to be in. Plain white walls just don’t cut it for me and I’d like to add some oomph to my surroundings. After all I am in my apartment for the majority of my day and I deserve pretty walls, damnit!

So my plan is pretty basic: take some amazing embroidery patterns, stitch em up, and put them on my wall! There is a caveat of course, to challenge myself. I’m doing that from the get go with this first pattern. I’ve chosen this great flower pattern from Urban Threads, an amazing site with such fantastic patterns for hand and machine embroiderers alike at great prices (typically $1 a piece, with ‘packs’ available at a discount). No, I don’t get a commission, I just really love the site and their patterns. Just a happy customer sharing their love of a brand.

flowers.jpg

So pretty! A perfect first project.

The pattern itself is pretty straightforward so the challenge comes with the size (about 11″ tall) and with the stitches I’ll be using. I’ve ordered a new embroidery book of stitches to browse through so I’ll be using something other than a regular backstitch. I also got some amazing beads to use! I’ll be putting beads on the leaf stems, the large flower highlights, and the center part of the small flower.


IMG_20160217_225907.jpg

This book so far has proven really informative. I like that there are sections on blackwork and other types of embroidery. I’ll do a full review later.

I’ve already got the supplies and the pattern has been traced, I just need to get started! I need to finish the final touches on my new Fable pattern makes first since that project has a deadline and then I’ll get to work. I’m really excited about this as it is a long term project I’ll not only enjoy doing but I’ll enjoy the final product and I’m glad I know what I’ll do with the finished pieces.

IMG_20160217_225756.jpg

The beads up close! I got different sizes based on what lines I’m going to use them on.

IMG_20160217_225804.jpg

Some of the threads, the bigger flower will be yellow and the smaller flower will be purple. As of now, at least.

IMG_20160217_225816.jpg

I even already have it traced out, I just need to actually stitch it up. I do have some other projects I’d like to finish first though.

Speaking of finished pieces, I found this amazing stuff for your finished needlework designs of all kinds. It is a glued foam board, so you can just stick your design to the glued side and do with it what you will! I’m excited to use it and I’ll let you know how it turns out. I have a feeling though it will make framing my finished pieces a lot easier and give me some leeway with how I use the finished pieces in general. Say I can’t frame it right away but I don’t want to leave it just laying around to get crumpled, I can stick it on this backing and file it away! That sounds neat to me. Either way, I’ll let you know how it turns out.

quick stick foam board.jpg

This stuff seems pretty awesome, there are even other similar options!

What are your favorite or unexpected embroidery tools, pattern sites, or books you love? Please share them with me, I’d love to add new books to my library, have new sites to browse, and tools to use. Share in the comments or follow me on Instagram to share with me!

The Fable will be out soon, today is photoshoot day and then BAM, release day! So stayed tuned for that.

Until next time,

— Bethany Out

Bridesmaid Dresses!

I have finally started on my bridesmaid dresses. My best friend wants us to wear tea length dresses with layers of lace and silk or taffeta. So what we have so far agreed to is a dress made up of three pieces: a basic dress made of silk or taffeta, a lace overlay dress, and a petticoat with lace trim to peek out from the bottom of the dress. Why three pieces? Well the other bridesmaid and I would like to wear these aside from just today so breaking things up into pieces makes them more useable. For myself I know I want the lace overlay in a million colors to wear with plain dresses underneath and shared plans about that in a previous post along with a fabric haul. So I will really get a lot of use out of this myself. I’ll probably make a long petticoat for the wedding and then shorten it to wear with my regular dresses because tea length is not a common length for me. I usually wear my dresses right above the knee or shorter.

download_20160209_131316.jpg

My very poorly sketched idea.

For the lace overlay I’ve already made progress! I started out with McCall’s 6646 and did a mockup to see how it fit. I was concerned it wouldn’t fit me because the smallest size is a size bigger than I usually go but McCall’s came through and the smallest size was quite snug! I went with the size larger because overlays don’t need to be that tight. Once I got the size I wanted I changed the neckline. I did this because as much as I love high necked dresses, I wanted more of a boat neck this time around which meant I needed to shorten it. I’ve noticed too that while I am petite, I tend to be petite in my bust to neck measurements, rather than in my lower torso. I don’t need to really shorten anything but the neckline, which is odd. It’s fine with me though!

IMG_20160203_110824.jpg

You can see the changes I’ve made based on the mockup.

What’s challenging about this fit is that the shoulder straps are now nearly non-existent. This means that I really have to make sure it’s a tight enough fit to ensure the straps will stay put without making the lace overlay too tight. I’ve also changed the armhole based on a pattern with a perfect fit for me so that is a nice change. Of course I’ll do another mockup before cutting the real fabric but this should do nicely. I may add elastic to the straps just in case as well depending on how it ends up fitting.

Now I’m testing the fit for the bodice of the real dress. I tried the McCall’s included bodice…and it was too big. Like I thought! So the overlay was perfect, the real dress was lacking. Figures. Thankfully it is just a typical princess seamed bodice of which there are many patterns for. I’m trying Simplicity 1606 next but am having trouble finding the right cup size. The wiast measurement is always so large compared to the bust and is always a good 3 inches bigger than my actual waist. It’s quite a pain getting that down, especially because I’m no busty girl. I am a b-cup and so why it’s so difficult to get a decent waist on these things is beyond me.

I haven’t started on the petticoat yet but I did get a pattern for one which is a start.I’m using Simplicity 5006. I know you can make them without a pattern and that it is just a ruffled rectangle at the bottom made of tulle/netting to get the poof you need. However, I’m not sure how much tulle I need or what skirt shape to go with. It’s a circle skirt dress which would make me think I need a circle skirt based petticoat but I’ll probably play around with it to see. Anyone else have experience with petticoats they would like to share? I’m open to most anything!

In other sewing news, well, I have started on a vintage shirt pattern, Simplicity 1590. I’ve been looking to make more separates and I feel this is a great basic that I can make in a variety of fabrics for casual or more business appropriate looks. I sewed up a quick mockup for fit and I’m not surprised it fits great in the waist and boobs but not the shoulders. The fit is way too tight across my shoulders and so I may have to size up and see if that helps. Thankfully it’s such a cute pattern it seems worth the fuss.

I’ve also got a new couple pieces of gear. I got a new zipper foot, much narrower than my previous foot. I’m hoping this will help me feel more motivated to finish my pink plaid dress as well as my pink dotted dress. I haven’t finished them because zippers are such a hassle and I have tried so many ways to put them in to no avail. Perhaps this narrower foot will help make things easier. I’ve also got a new way of storing fabric, a lovely closet hanging thing from IKEA. I love IKEA I really do. This helps me sort everything, keep it out of the way, and it is actually quite sturdy.

IMG_20160209_111803.jpg

Pretty huge difference if you ask me!

IMG_20160204_165517.jpg

So handy to have around and in a cute purple to boot.


The new Vesta Pattern the Fable will be out soon and I’m getting great shots of my finished pieces while the weather is still great. Have a great week everyone and as always,

Until next time,

—Bethany Out

Fabric Haul, Future Plans!

Since I can’t share any pictures with you on The Fable progress, I might as well share some ideas I have for projects to work on when I’m done!

I keep buying more fabric even though I haven’t been working on anything but I’m happy to say I’ve been working harder on making sure I buy only what I know for a fact I will wear and enjoy. We know how things go: we see a beautiful fabric, take it home, and never use it because it turns out it isn’t actually our style and it sits there while you feel guilty for every buying it. I used to do this constantly. I have an entire stash of fabric I home that I haven’t even missed (aside from the faux fur) that indicates my buying habits need to be altered. I have been so good lately about buying more solids for separates and what prints I do buy are a healthy mix of professional and novelty that express my more fun side without making me feel too odd about wearing them.

I also am buying patterns to replace patterns that I like but don’t love enough to make them. Some patterns do just need the right fabric for inspiration so I haven’t gotten rid of them completely but I recognize that I didn’t pick them realistically.

Here’s the new fabrics and the patterns I bought recently as well as ideas for what to do with them.

DSCF2381.JPG

Top left: cotton novelty fabric with sewing notions (I also have the matching reusable bag) Top middle: sheer brown poly with a fun lion print down one side      Left middle: cotton with oranges and pinks that look like brushstrokes, also the rose rayon from Gertie’s fabric line    Middle right: sheer poly with red flower motif that feels like velvet   Bottom: solid green poly blend   Bottom right: blue/green plaid wool blend  Right: black faux fur

DSCF2383.JPG

I may have a lot of new patterns…

DSCF2384.JPG

The only “modern” patterns I bought. I love the knit pencil skirt of the left pattern and that is a nice jacket pattern as well. I have a similar pattern for wovens so this is a good counterpart. The middle dress might actually become my bridesmaid dress since the other one doesn’t go to a small enough size. The right pattern is just one I’ve been eyeing for a while and I’m excited to try something new.

DSCF2386.JPG

Some 40’s patterns. I need to start getting separates and this shirt has buttons, my new favorite closure method (die, zippers!). I also love the skirt yoke on the dress, the only reason I got it.

DSCF2387.JPG

50’s patterns of course. I love the bodice darts and gathering on the dresses, and the long peplum is just too darn adorable.

DSCF2385.JPG

60’s! This dress is stunning and I am so excited for this cape. The pockets seem really convenient and doesn’t take up too much fabric compared to some cape patterns.

DSCF2388.JPG

This seems a bit of a stretch for ‘retro’ but I want to actually make both of these garments and try to style the skirt in a more modern fashion. I haven’t figured out how I’ll do it but I will!

DSCF2389.JPG

I also got some costume patterns! I decided that the only ‘resolution’ I have for this year is to make a costume of some kind. I don’t know if it will be fantasy or historically based but either way I will be prepared! I picked these patterns for their pieces and therefore versatility. Some of the pieces I’m incredibly excited for, like the collar ruff. Having a pattern for this will make my job that much easier.  

DSCF2382.JPG

For the wool and faux fur I want to make a coat! I got this pattern for the great collar that is also a hood and it seems like if I finish off the inside seams nicely enough I can leave off with the lining! I haven’t decided on that detail though so we’ll see.

DSCF2391.JPG

I didn’t think about this rayon for this dress at first but it really yells at me to do it. It isn’t silk rayon but being rayon should work well enough I think. I’ll do view A for the cute bow!

DSCF2392.JPG

This green fabric will be a basic circle skirt with princess seam bodice. I thought this green would be great for under the black lace, so it will be the basic layering dress that can stand on its own.

DSCF2393.JPG

Since this pattern uses buttons, I’m going to use this cotton. I know a lot of people dislike quilting cottons for garments but after washing they are quite nice and aren’t too stiff. I think it will be perfect!

DSCF2394.JPG

This seems like an odd combination but…this novelty print seems like it would make the perfect view C! I’ll make a contrasting belt instead of the novelty fabric but still, how cute!

So that’s it! The new fabrics, some ideas for the future, lots of fun stuff! I don’t know what I’ll do with all of my new fabric and patterns but that’s ok. I think that’s normal for us sewists, don’t you?

I’m quite excited to finally get to share the Fable patterns with you. I’ve finished two; one for the hell of it (and my first true run through with real fabric) and the second for the walk through blog post I’m writing to go with it. It is a great garment and I’ll be making more after this definitely. I do want to get my coat finished, and insert the zippers on my two pink based dresses before starting on more but I can honestly say I love this pattern. I think you all will too and I am just so excited to share it with you. So stay tuned! Vesta Patterns will be adding the Fable within the next couple of weeks and you’ll be in love at first sight!

Until next time,

—Bethany out